
高密码复杂度检查 | 身份鉴别
描述
检查密码长度和密码是否使用多种字符类型
检查提示
—
加固建议
编辑/etc/security/pwquality.conf,把minlen(密码最小长度)设置为9-32位,把minclass(至少包含小写字母、大写字母、数字、特殊字符等4类字符中的3类或4类)设置为3或4。如:
minlen=10

minclass=3
操作时建议做好记录或备份
高密码复杂度检查 | 身份鉴别
描述
检查密码长度和密码是否使用多种字符类型
检查提示
—
加固建议
编辑/etc/security/pwquality.conf,把minlen(密码最小长度)设置为9-32位,把minclass(至少包含小写字母、大写字母、数字、特殊字符等4类字符中的3类或4类)设置为3或4。如:
minlen=10
minclass=3
操作时建议做好记录或备份

描述
设置SSH空闲超时退出时间,可降低未授权用户访问其他用户SSH会话的风险
检查提示
—
加固建议
编辑/etc/ssh/sshd_config,将ClientAliveInterval 设置为300到900,即5-15分钟,将ClientAliveCountMax设置为0-3之间。
ClientAliveInterval 600

ClientAliveCountMax 2
操作时建议做好记录或备份

设置密码失效时间 | 身份鉴别
描述
设置密码失效时间,强制定期修改密码,减少密码被泄漏和猜测风险,使用非密码登录方式(如密钥对)请忽略此项。
检查提示
—
加固建议
使用非密码登录方式如密钥对,请忽略此项。在 /etc/login.defs中将 PASS_MAX_DAYS 参数设置为 60-180之间,如:
PASS_MAX_DAYS 90
需同时执行命令设置root密码失效时间:
chage --maxdays 90 root
操作时建议做好记录或备份
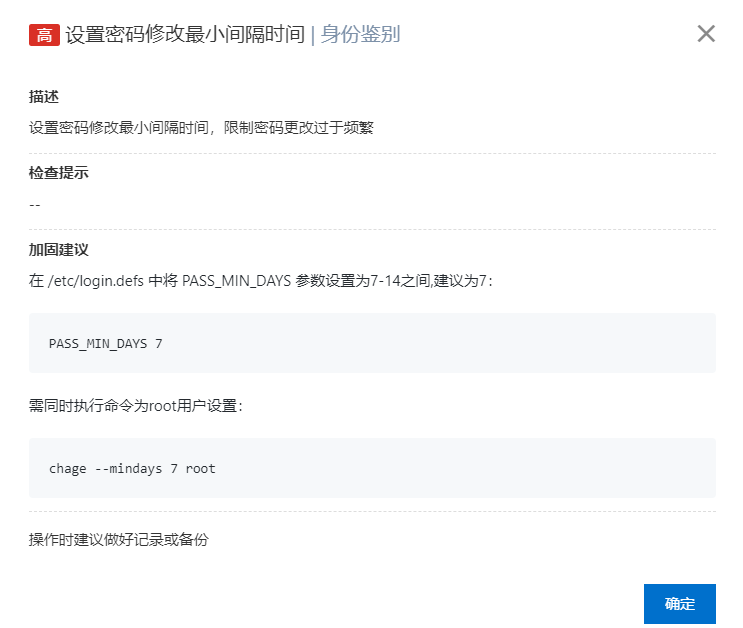
设置密码修改最小间隔时间 | 身份鉴别
描述
设置密码修改最小间隔时间,限制密码更改过于频繁
检查提示
—
加固建议
在 /etc/login.defs 中将 PASS_MIN_DAYS 参数设置为7-14之间,建议为7:
PASS_MIN_DAYS 7需同时执行命令为root用户设置:
chage --mindays 7 root操作时建议做好记录或备份
其实有很多插件是可以实现 wordpress 远程图片本地化的,但是有可能插件太多了,会影响网站的性能或者拖累服务器,降低网站的运行速度。不过如果你是代码控,不喜欢用插件,那么下面这段“wordpress 远程图片自动本地化“的代码也许适合你,复制下面的代码,然后粘贴到你当前 WordPress 主题的模版函数(functions.php)文件中保存即可
//自动本地化外链图片
add_filter('content_save_pre', 'auto_save_image');
function auto_save_image($content) {
$upload_path = '';
$upload_url_path = get_bloginfo('url');
//上传目录
if (($var = get_option('upload_path')) !=''){
$upload_path = $var;
} else {
$upload_path = 'wp-content/uploads';
}
if(get_option('uploads_use_yearmonth_folders')) {
$upload_path .= '/'.date("Y",time()).'/'.date("m",time());
}
//文件地址
if(($var = get_option('upload_url_path')) != '') {
$upload_url_path = $var;
} else {
$upload_url_path = bloginfo('url');
}
if(get_option('uploads_use_yearmonth_folders')) {
$upload_url_path .= '/'.date("Y",time()).'/'.date("m",time());
}
require_once ("../wp-includes/class-snoopy.php");
$snoopy_Auto_Save_Image = new Snoopy;
$img = array();
//以文章的标题作为图片的标题
if ( !empty( $_REQUEST['post_title'] ) )
$post_title = wp_specialchars( stripslashes( $_REQUEST['post_title'] ));
$text = stripslashes($content);
if (get_magic_quotes_gpc()) $text = stripslashes($text);
preg_match_all("/ src=(\"|\'){0,}(http:\/\/(.+?))(\"|\'|\s)/is",$text,$img);
$img = array_unique(dhtmlspecialchars($img[2]));
foreach ($img as $key => $value){
set_time_limit(180); //每个图片最长允许下载时间,秒
if(str_replace(get_bloginfo('url'),"",$value)==$value&&str_replace(get_bloginfo('home'),"",$value)==$value){
//判断是否是本地图片,如果不是,则保存到服务器
$fileext = substr(strrchr($value,'.'),1);
$fileext = strtolower($fileext);
if($fileext==""||strlen($fileext)>4)
$fileext = "jpg";
$savefiletype = array('jpg','gif','png','bmp');
if (in_array($fileext, $savefiletype)){
if($snoopy_Auto_Save_Image->fetch($value)){
$get_file = $snoopy_Auto_Save_Image->results;
}else{
echo "error fetching file: ".$snoopy_Auto_Save_Image->error."<br>";
echo "error url: ".$value;
die();
}
$filetime = time();
$filepath = "/".$upload_path;//图片保存的路径目录
!is_dir("..".$filepath) ? mkdirs("..".$filepath) : null;
//$filename = date("His",$filetime).random(3);
$filename = substr($value,strrpos($value,'/'),strrpos($value,'.')-strrpos($value,'/'));
//$e = '../'.$filepath.$filename.'.'.$fileext;
//if(!is_file($e)) {
// copy(htmlspecialchars_decode($value),$e);
//}
$fp = @fopen("..".$filepath.$filename.".".$fileext,"w");
@fwrite($fp,$get_file);
fclose($fp);
$wp_filetype = wp_check_filetype( $filename.".".$fileext, false );
$type = $wp_filetype['type'];
$post_id = (int)$_POST['temp_ID2'];
$title = $post_title;
$url = $upload_url_path.$filename.".".$fileext;
$file = $_SERVER['DOCUMENT_ROOT'].$filepath.$filename.".".$fileext;
//添加数据库记录
$attachment = array(
'post_type' => 'attachment',
'post_mime_type' => $type,
'guid' => $url,
'post_parent' => $post_id,
'post_title' => $title,
'post_content' => '',
);
$id = wp_insert_attachment($attachment, $file, $post_parent);
$text = str_replace($value,$url,$text); //替换文章里面的图片地址
}
}
}
$content = AddSlashes($text);
remove_filter('content_save_pre', 'auto_save_image');
return $content;
}
function mkdirs($dir){
if(!is_dir($dir)){
mkdirs(dirname($dir));
mkdir($dir);
}
return ;
}
function dhtmlspecialchars($string) {
if(is_array($string)) {
foreach($string as $key => $val) {
$string[$key] = dhtmlspecialchars($val);
}
}else{
$string = str_replace('&', '&', $string);
$string = str_replace('"', '"', $string);
$string = str_replace('<', '<', $string);
$string = str_replace('>', '>', $string);
$string = preg_replace('/&(#\d;)/', '&\1', $string);
}
return $string;
}
目的:
访问https://www.a.com/1.html
301跳转到http://www.a.com/test/2.html
方法:
if ($request_uri = /1.html ) { return 301 http://www.a.com/test/2.html; }
经测试可以达到预期目的。
具体操作步骤如下:
1.备份一下数据库。
2.登陆phpMyAdmin,点击“SQL”.
注:如果使用的是云服务器或者VPS,也可以直接在服务器中登陆SQL数据库进行操作。
输入以下SQL命令:
UPDATE YourDBName_posts SET post_content = REPLACE( post_content, 'YourOldUrl', 'YourNewUrl' )YourDBame 默认是wp
3.点击“执行”就可以替换掉原来的URL.
在建站过程中我们会遇到需要将不带www的域名301重定向到带www的域名上。这样做可以将权重集中到一起。对搜索引擎优化起到集权的作用。下面介绍一下在宝塔面板下面Nginx 301的写法。
server_name wildhorde.com www.wildhorde.com;

if ($host ~* wildhorde.com) {

rewrite ^/(.*)$ http://www.wildhorde.com/$1 permanent;

}
宝塔面板Nginx文件配置路径:/www/server/panel/vhost/rewrite/xxx.conf
或者直接在网站→伪静态下面添加配置内容。
1.阿里云提供生成修复命令,但是这个只提供给企业版,即收费的;
2.自己手动修复的话, 采用软件升级一般都可以解决。除了提示带kernel的高危漏洞的,其他的不需要重启实例即可修复. 有kernel的需要更新完成重启实例。
①这里可以先把“漏洞名称”百度一下,然后按搜到的方法处理就可以了
②网上没有解决办法,或最粗暴的方法,升级更新系统软件
#root登陆

yum check-update #查看可升级的系统软件

yum upgrade  #升级所有可升级的系统软件

#等待执行完成.
完成后, 在阿里云控制台验证。等待几分钟的时间,刷新页面,查看处理情况。
若存在kernel的高危漏洞, 需要重启服务器。
yum 安装软件时出现 is this ok [y/d/n]
y下载安装
d只下载不安装
n不安装
作为在写 WordPress 性能优化教程前的预热,我们需要先了解到 WordPress 前端页面的一个性能情况,而最直接的就是查看页面生成的需要多少时间,这样我们才能知道在以后的优化后会有多大的提升。

WordPress 提供了一个,timer_stop()函数,官方给出的介绍为:检索或显示从页面开始到调用函数的时间。简单的说就是我们访问一个 WordPress 链接,服务器生成处理这个页面所需要的时间,当然这并不是指我们打开或者加载这个页面的时间。更多的是服务器端的处理速度和 WordPress 本身运行情况。
1 2 3 4 5 6 7 8 9 10 |
//函数 timer_stop( $display, $precision = 3 ) //$display:是否直接输出,int | bool 必选,是否回显或返回结果。0 或 false 表示返回;1 或 true 表示输出显示。默认值为 0 | false。 //$precision:精度,int 可选,指要显示的小数点右边的位数。默认为 3. //示例 <?php timer_stop(1);//直接输出显示 ?> |
最后分享一个比较常见的关于 WordPress 显示当前页面数据库查询次数、页面生成时间以及服务器内存消耗情况的方法代码,如下:
1 |
<?php if(current_user_can('manage_options')){echo '<!-- ' . get_num_queries() . ' queries in ' . timer_stop(0,3) . ' seconds ' . memory_get_peak_usage()/1024/1024 . 'MB memory -->';}?> |
以上我还多添加了一个判断,就是当只有管理员登录的情况下查看源代码就会有相关的信息输出啦,喜欢折腾的朋友们赶紧看看你们 WordPress 站点性能是什么一个情况吧!
版权所有 © 2026 野人部落实验室
主题设计 Anders Noren — 返回顶部 ↑